

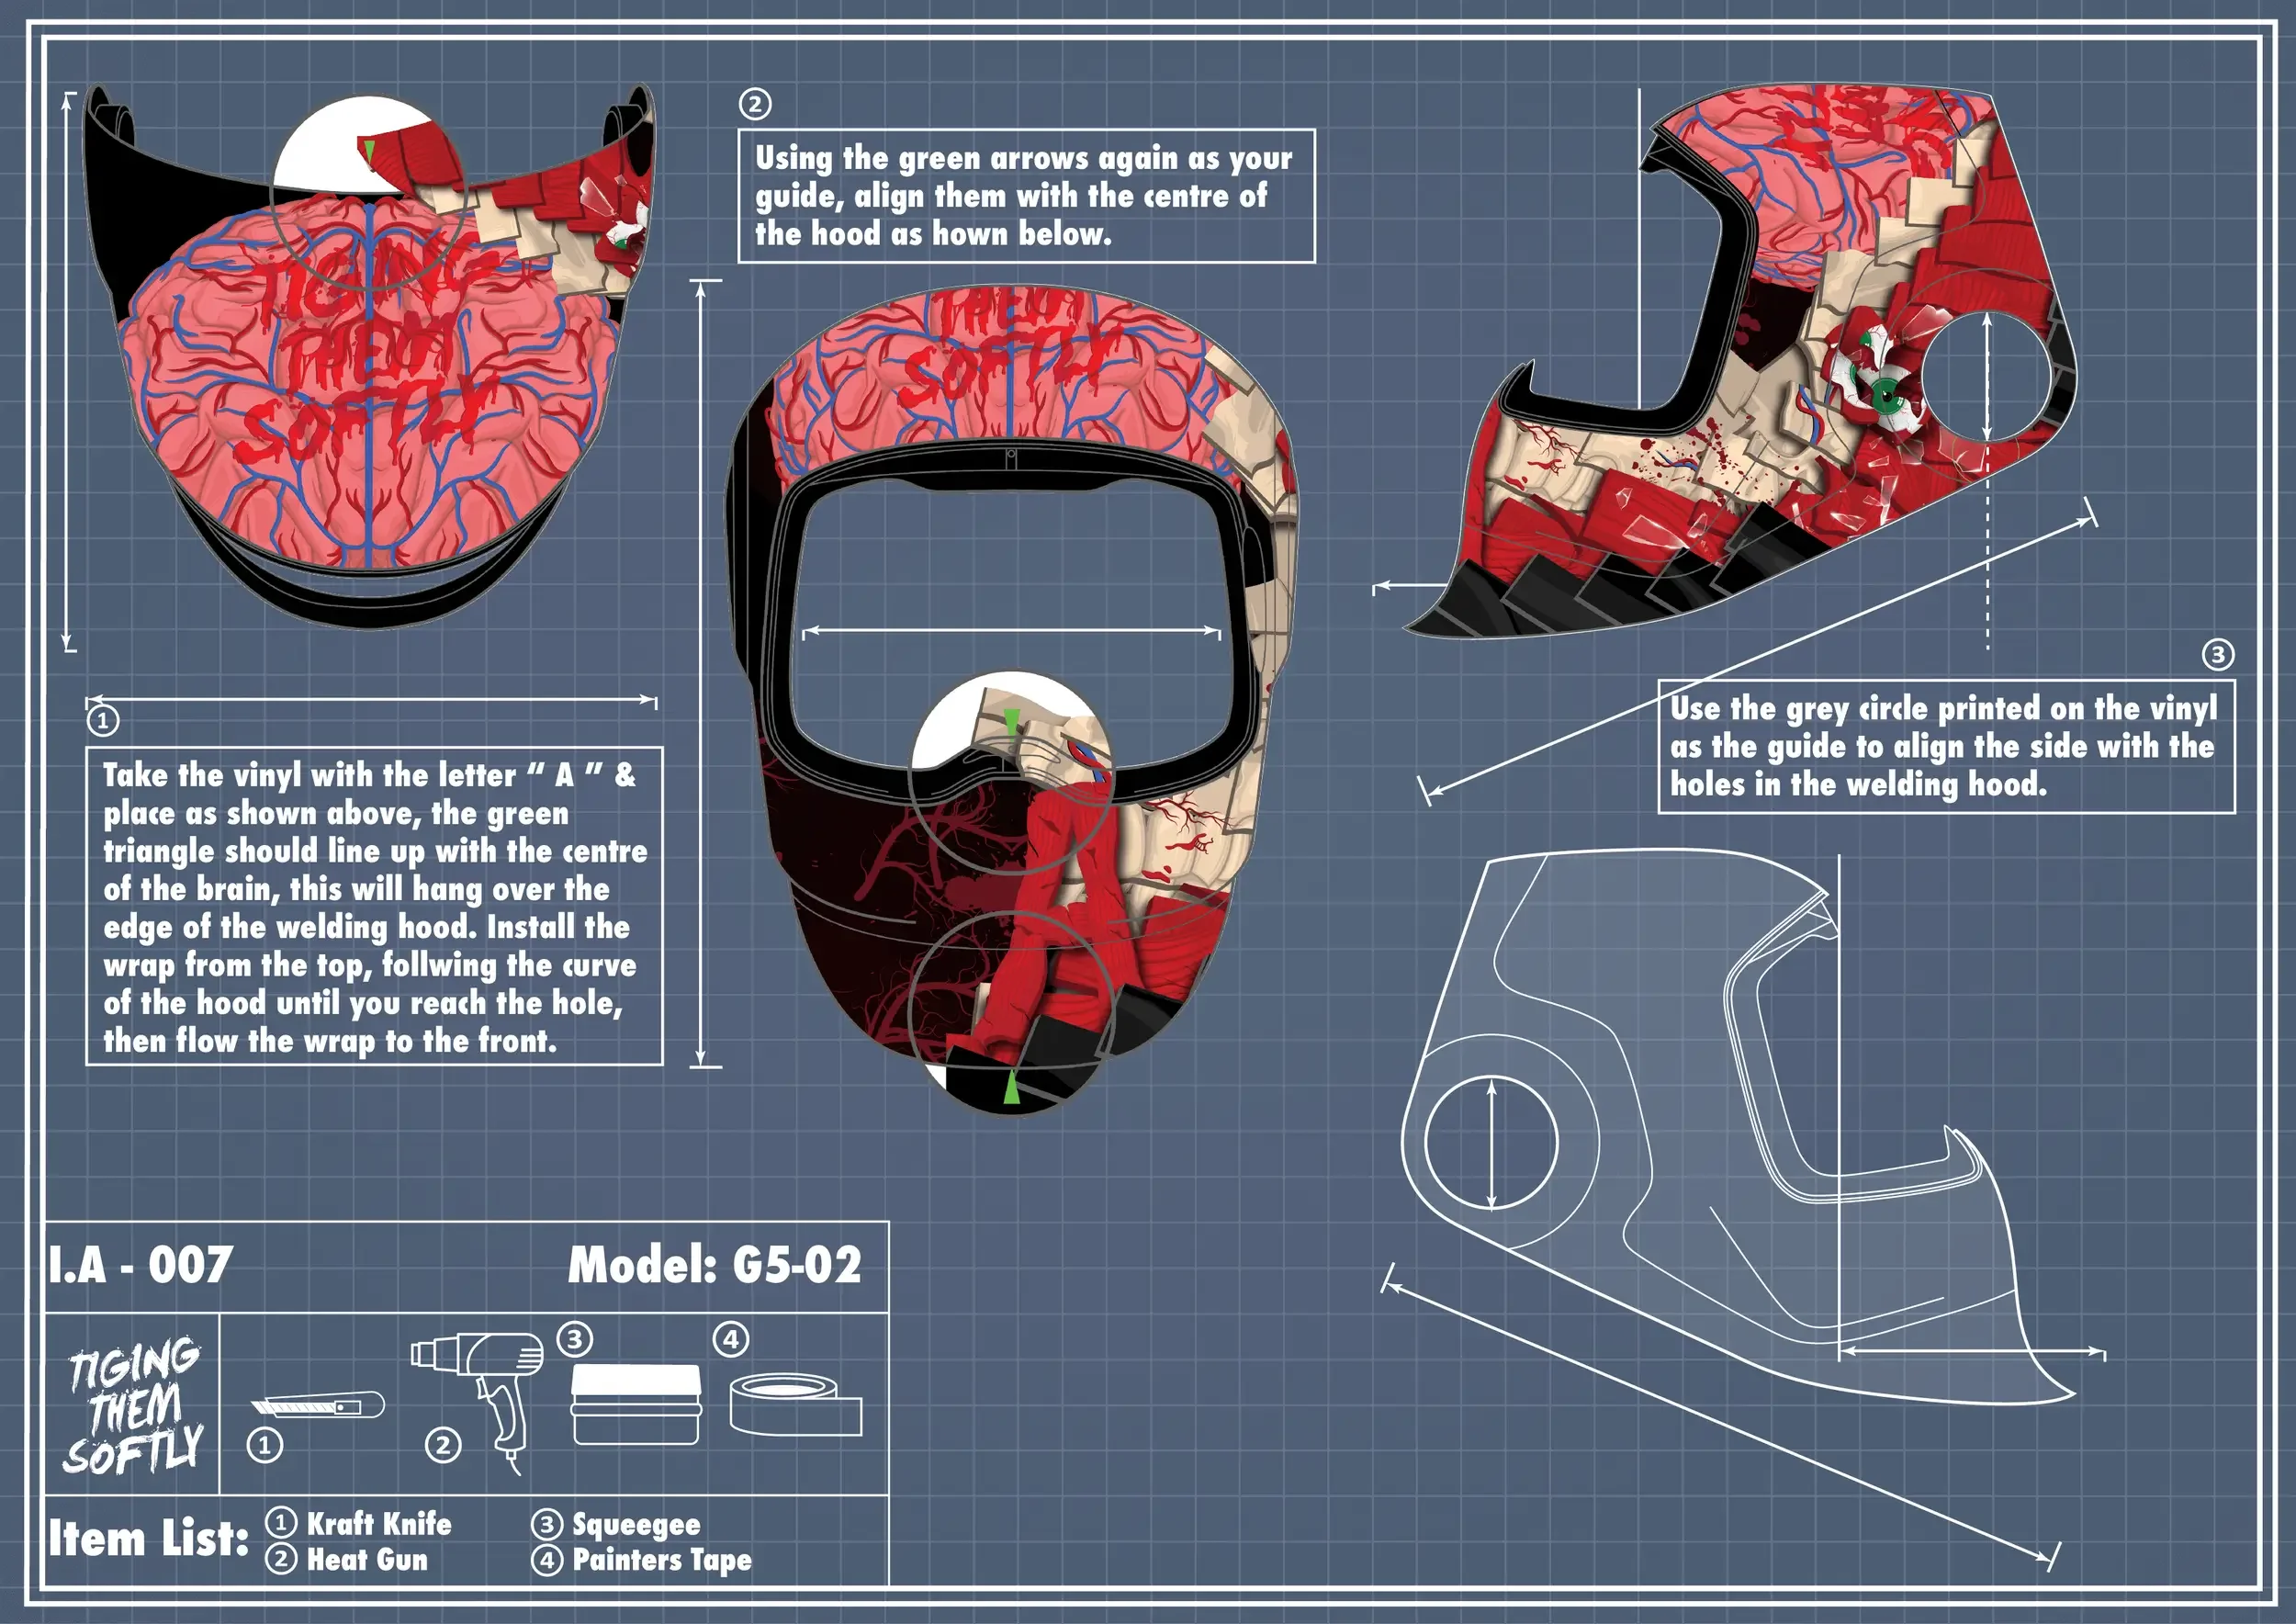
Flesh Welding Hood Vinyl Wrap Installation Guide
Transform your welding helmet with IA-FAB’s Flesh Vinyl Wrap — designed for welders who want to stand out while protecting their gear. Below, you’ll find step-by-step installation instructions and fitment diagrams for each supported model. Every IA-FAB wrap uses high-temp vinyl with UV protection and bubble-free adhesive for a smooth, professional finish.

How to Install Your Flesh Wrap
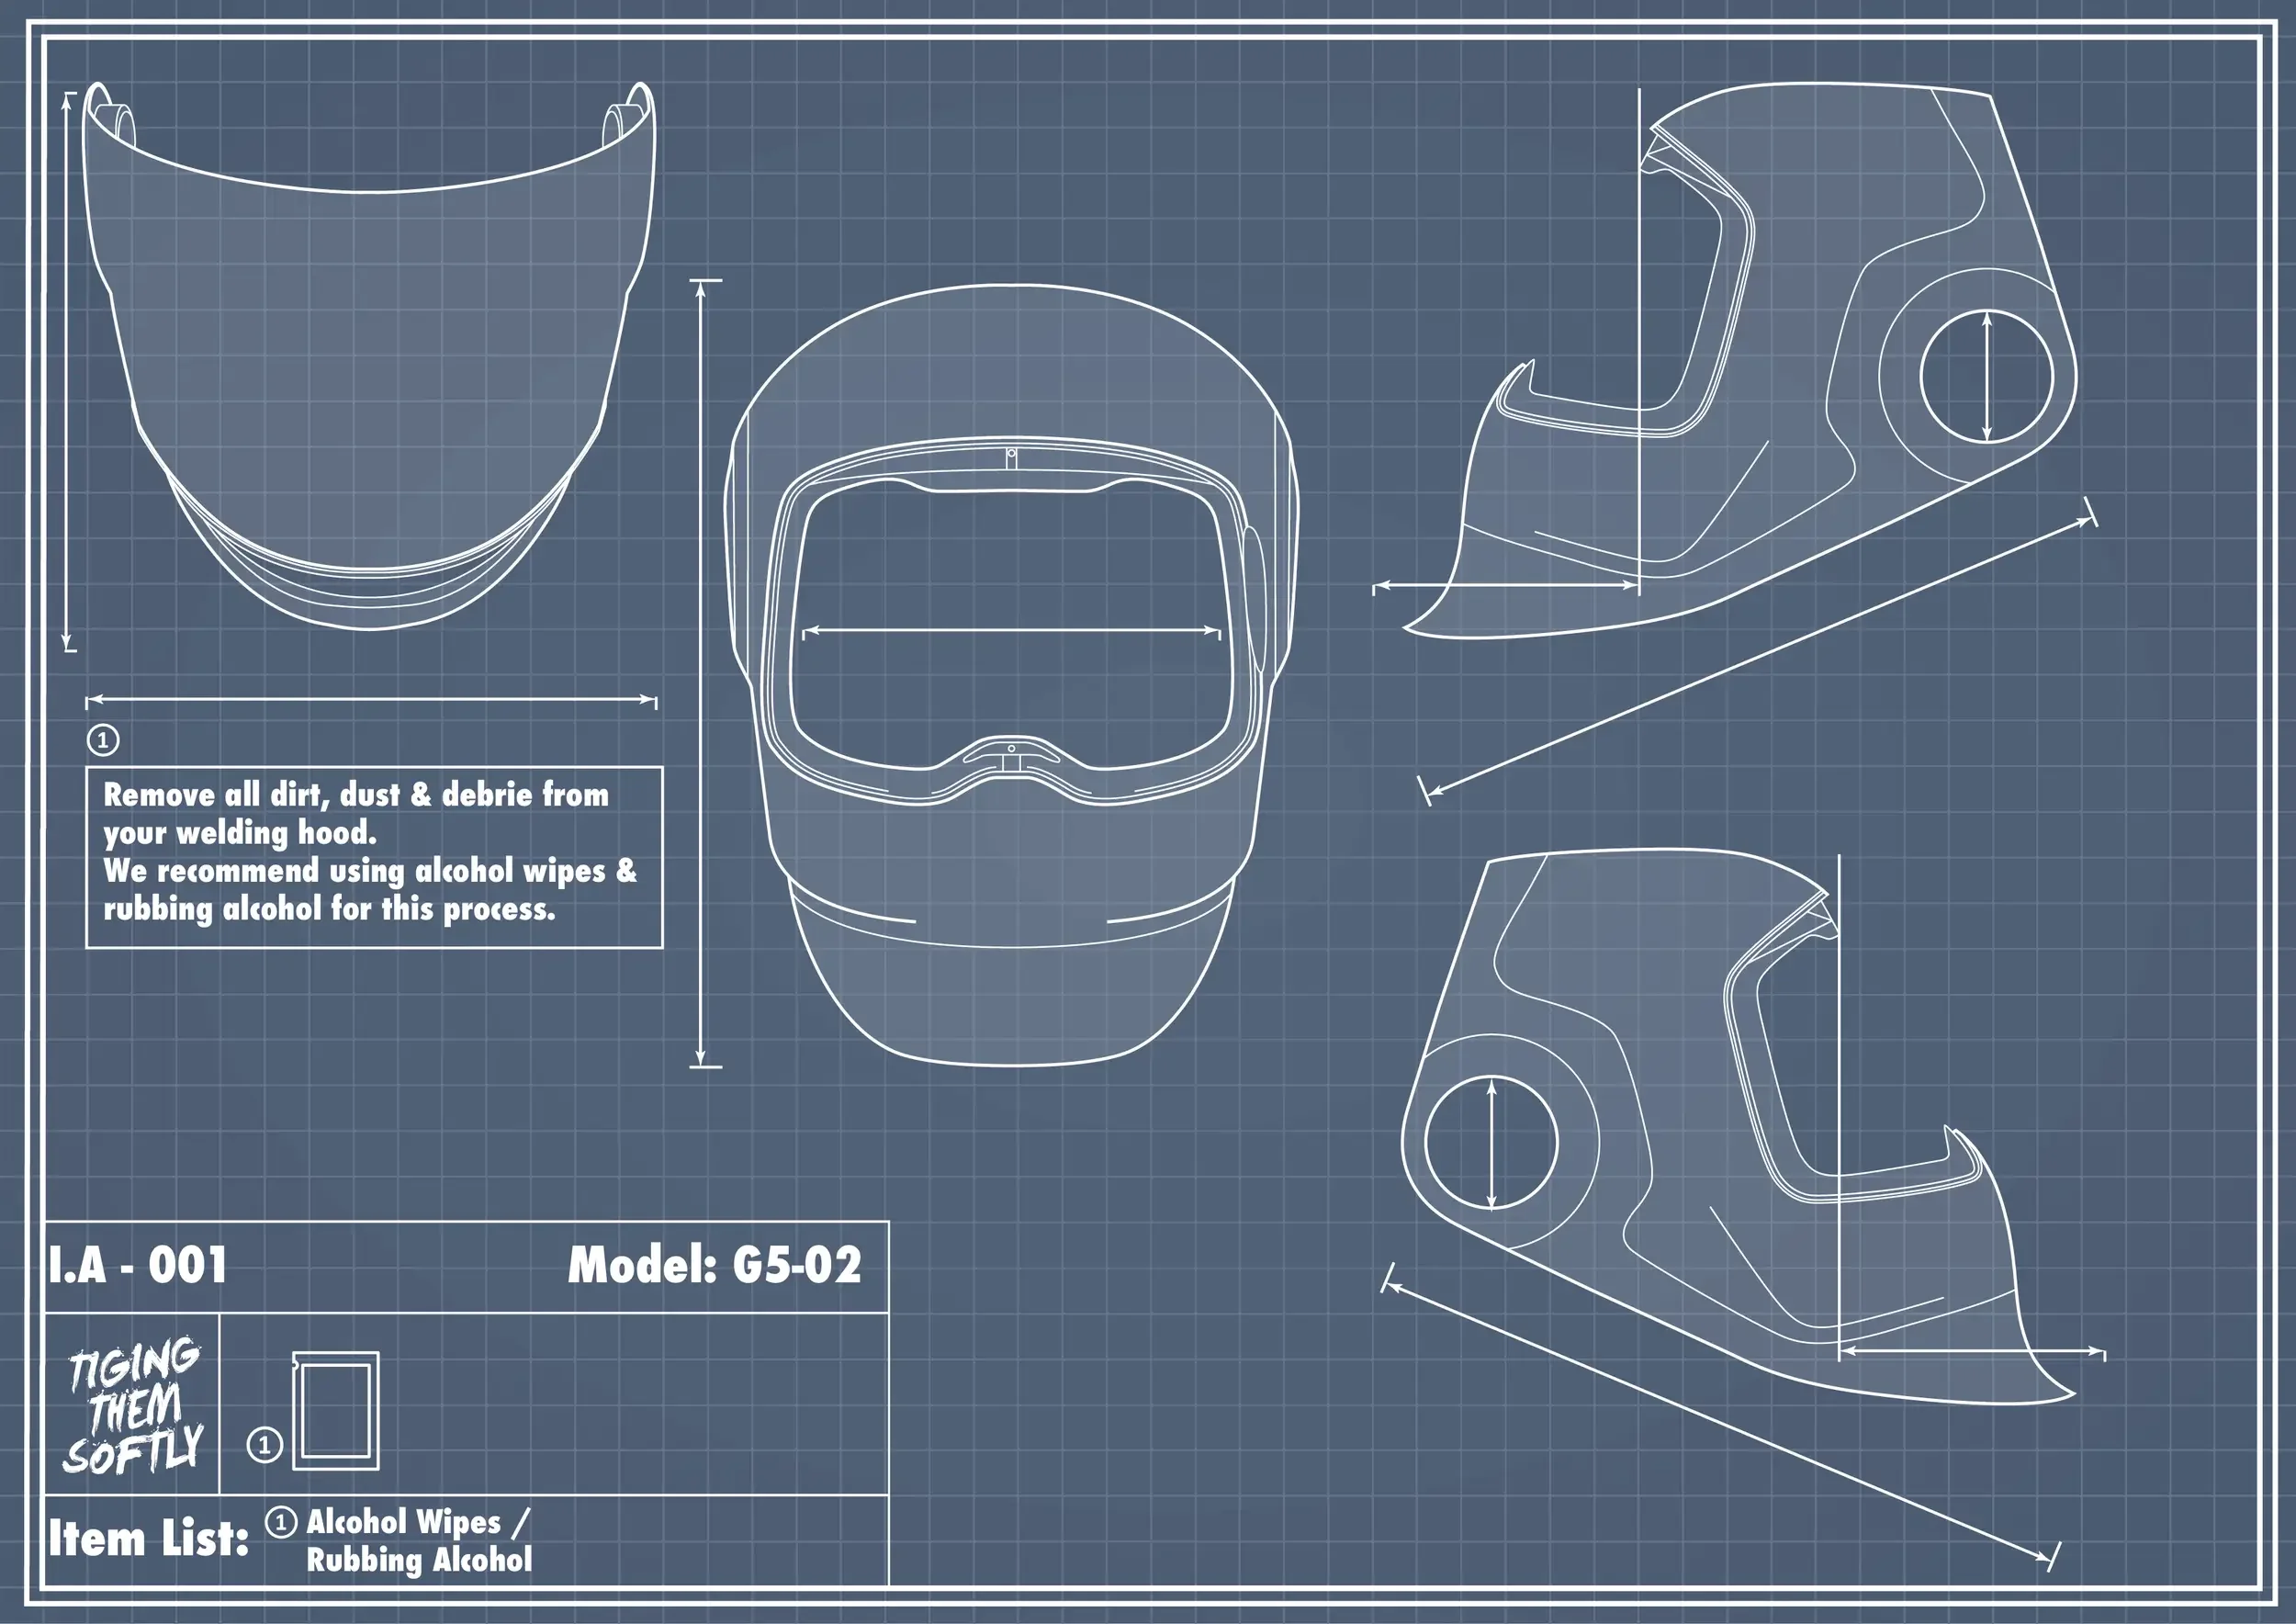
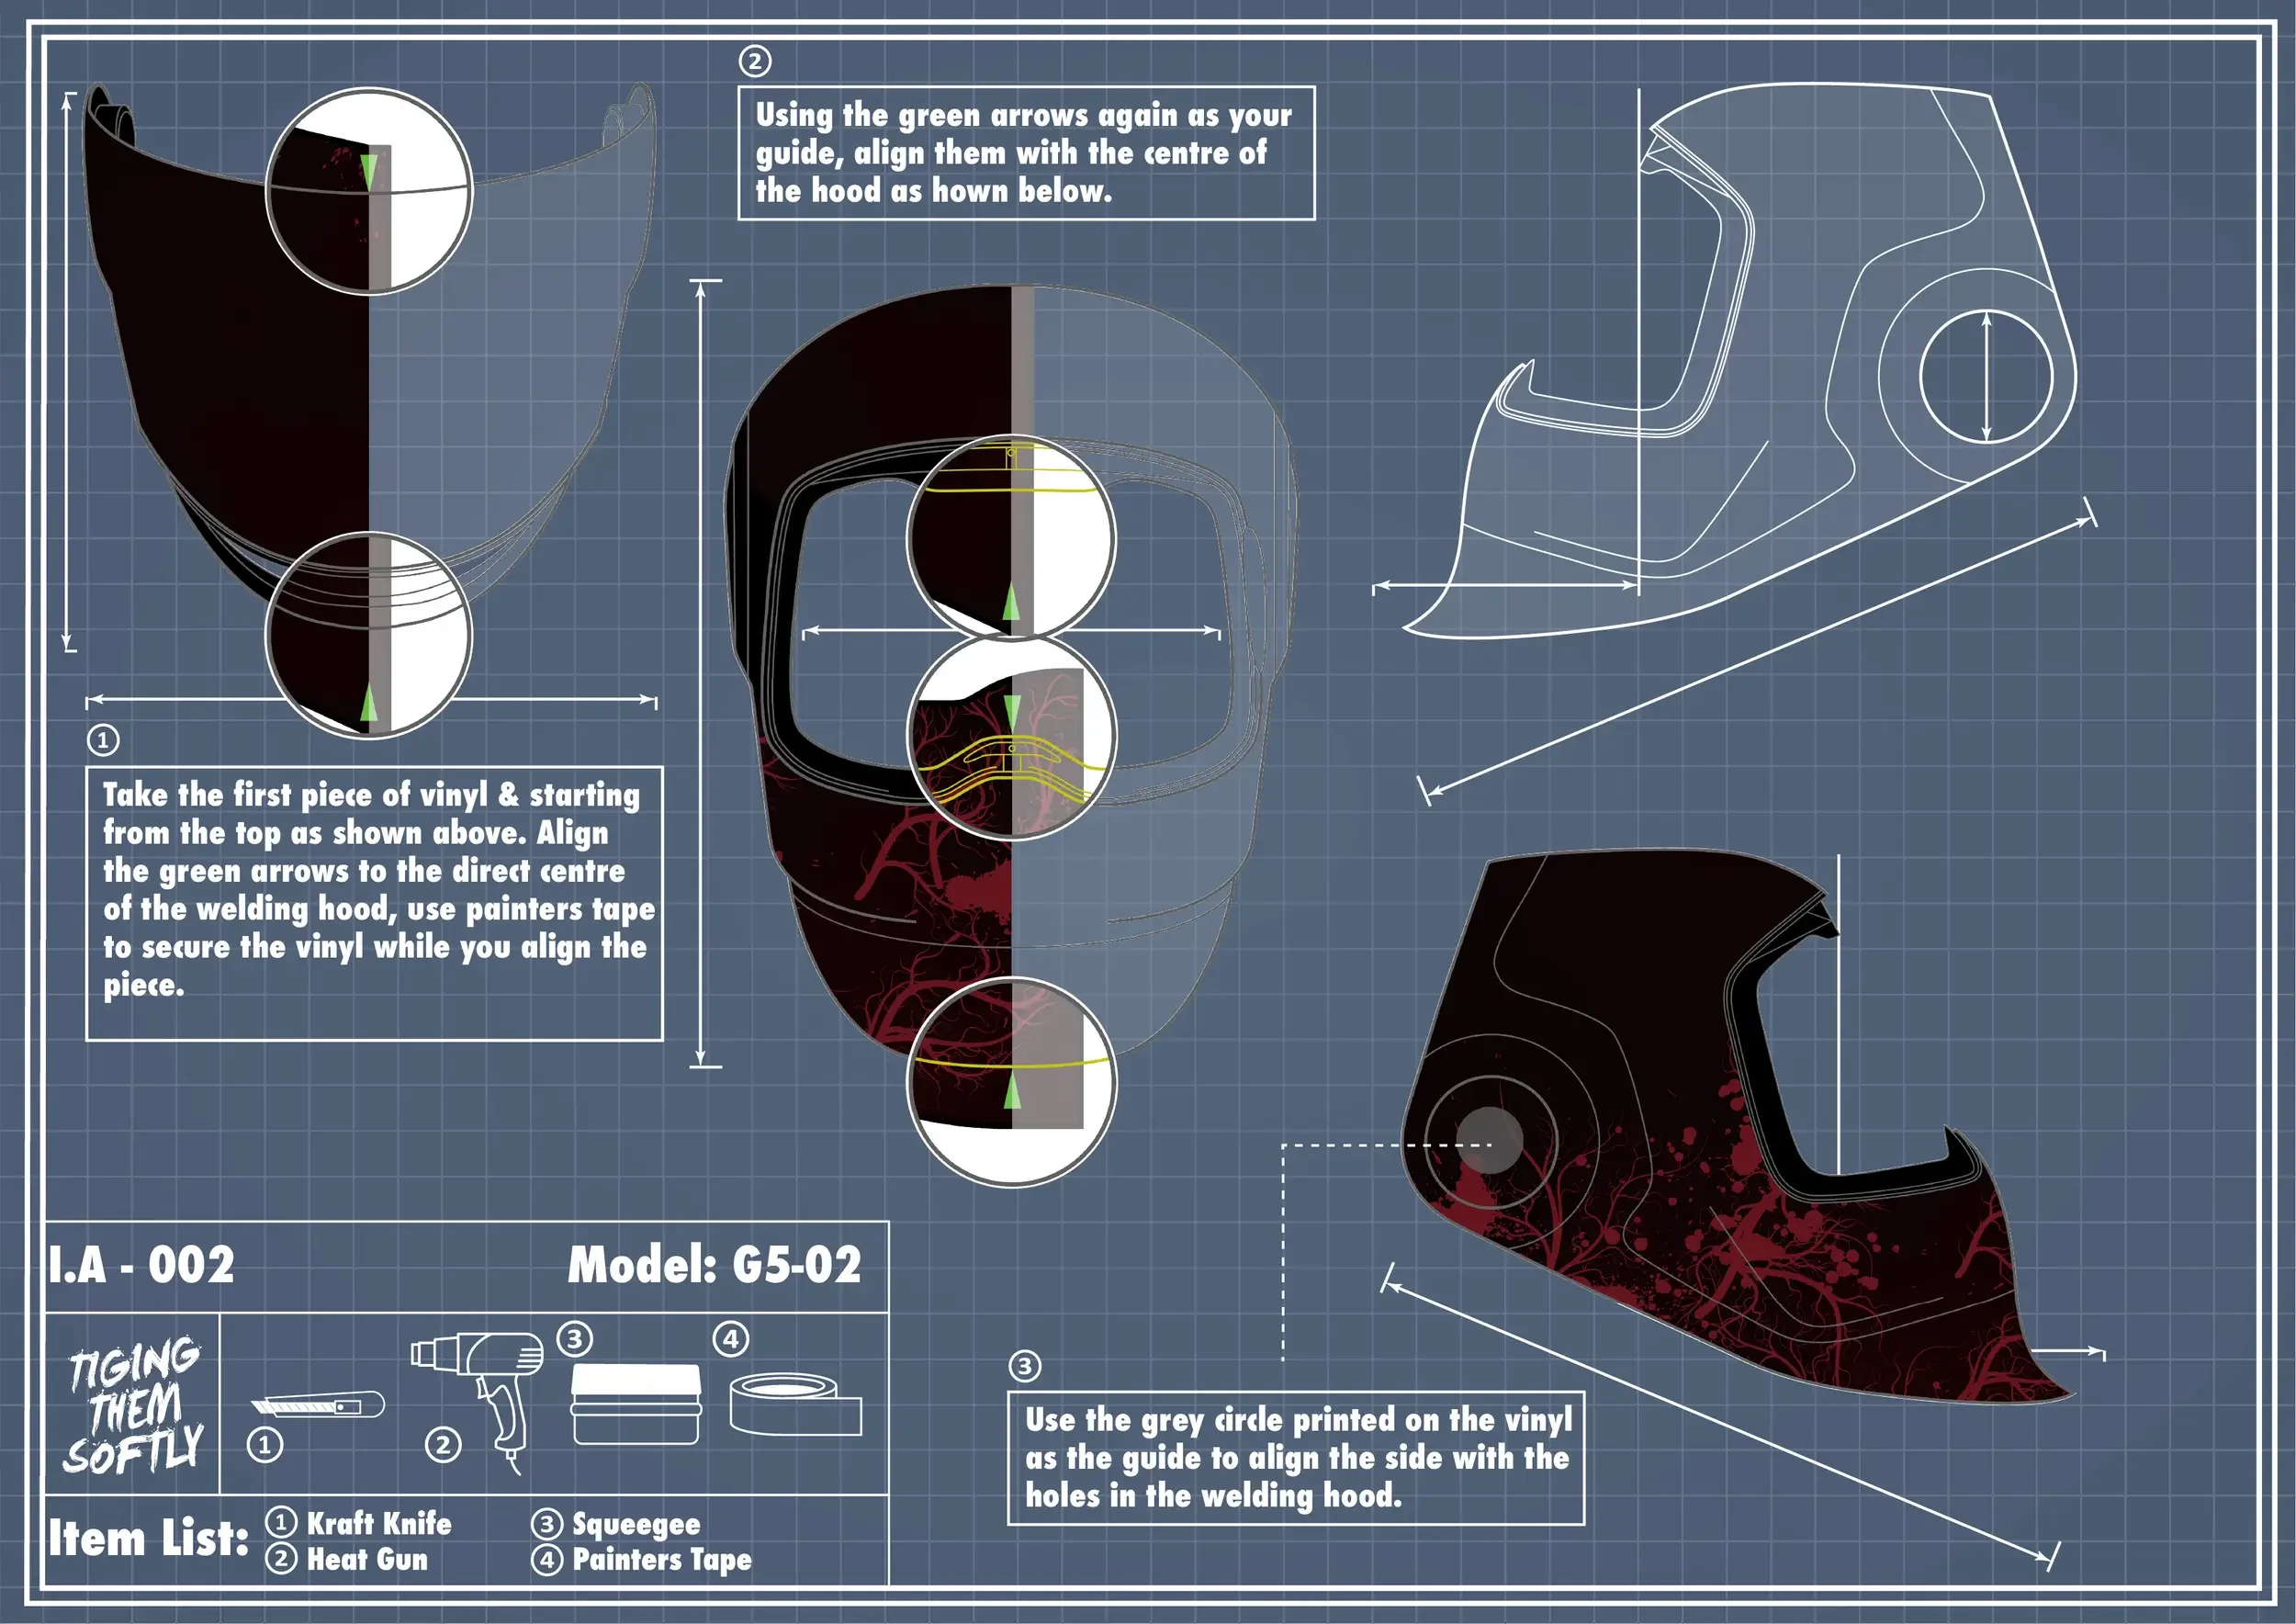
Each wrap includes model-specific cutouts and alignment guides. Before starting, clean your helmet surface thoroughly with isopropyl alcohol and ensure it’s dry. We recommend working in a dust-free environment and using the IA-FAB Installation Kit for best results.
Tools You’ll Need
Microfiber Cloth/Wipe
IA-FAB installation kit
Isopropyl alcohol to clean
Precision blade or knife
Heat gun or hair dryer
Patience & a steady hand
Flesh Wrap Instructions
The Flesh wrap comes pre-cut to fit popular welding hood models. Follow the diagrams and steps below for each model to ensure proper fit and adhesion.

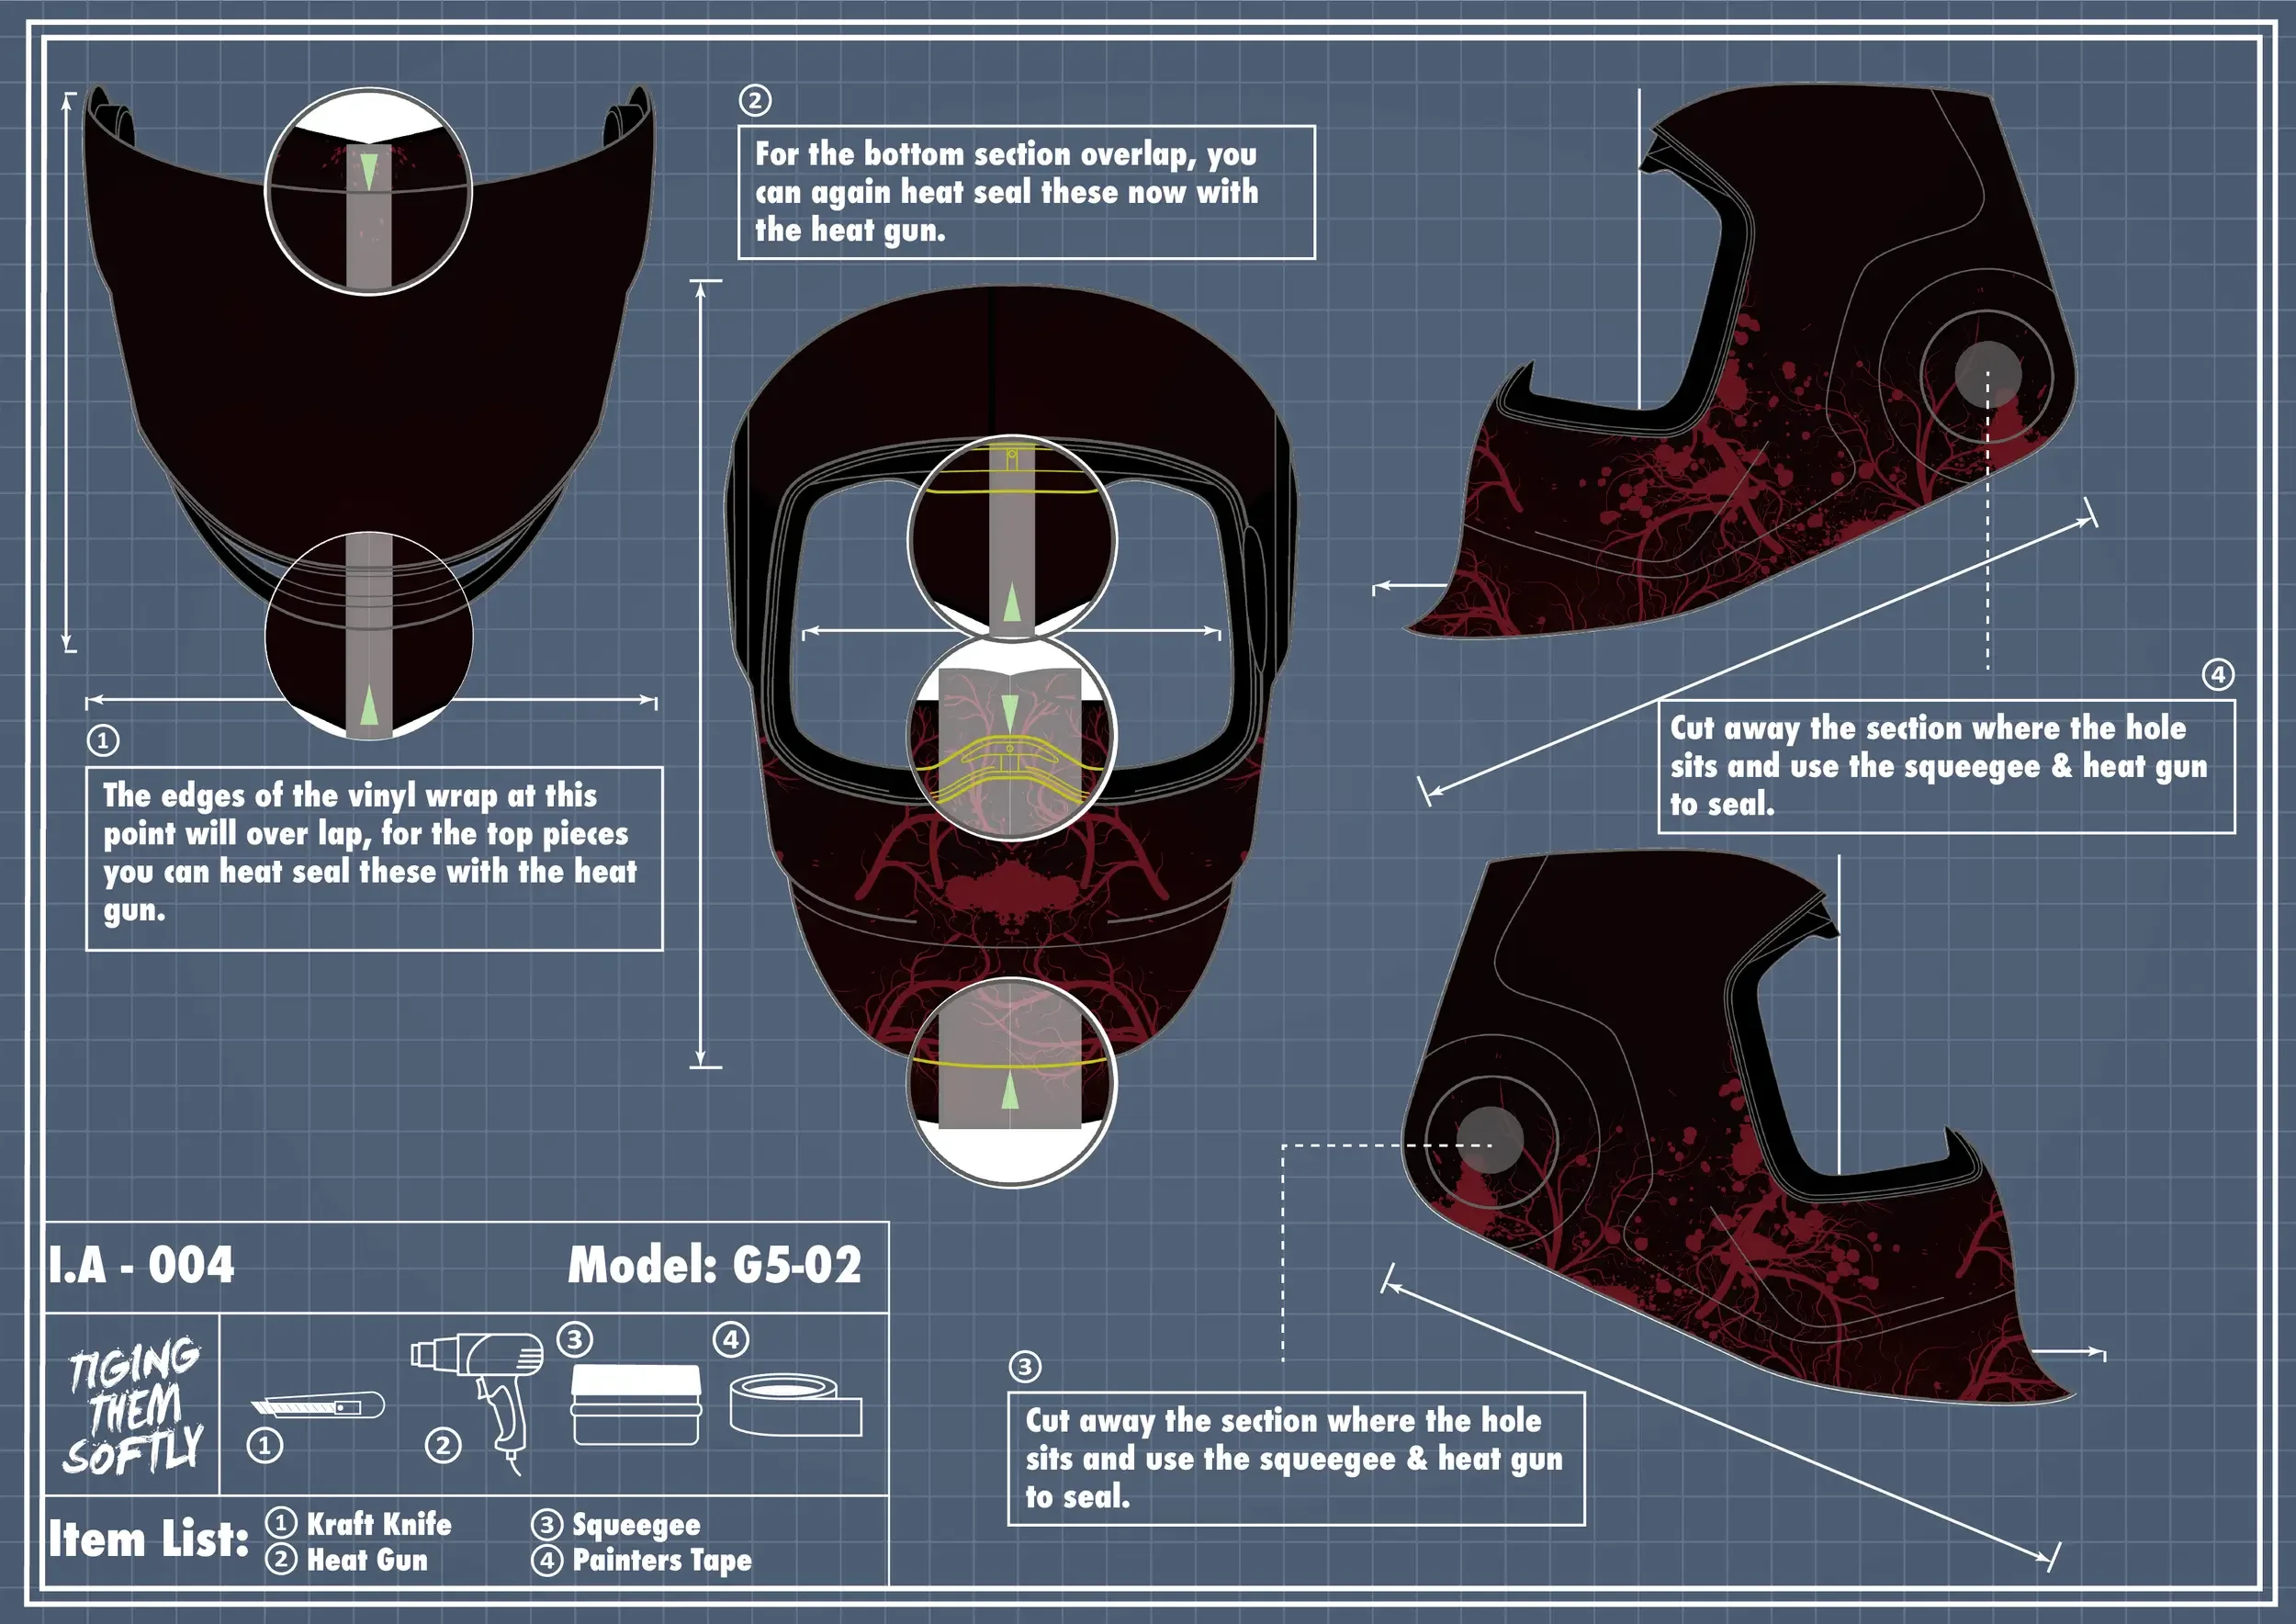
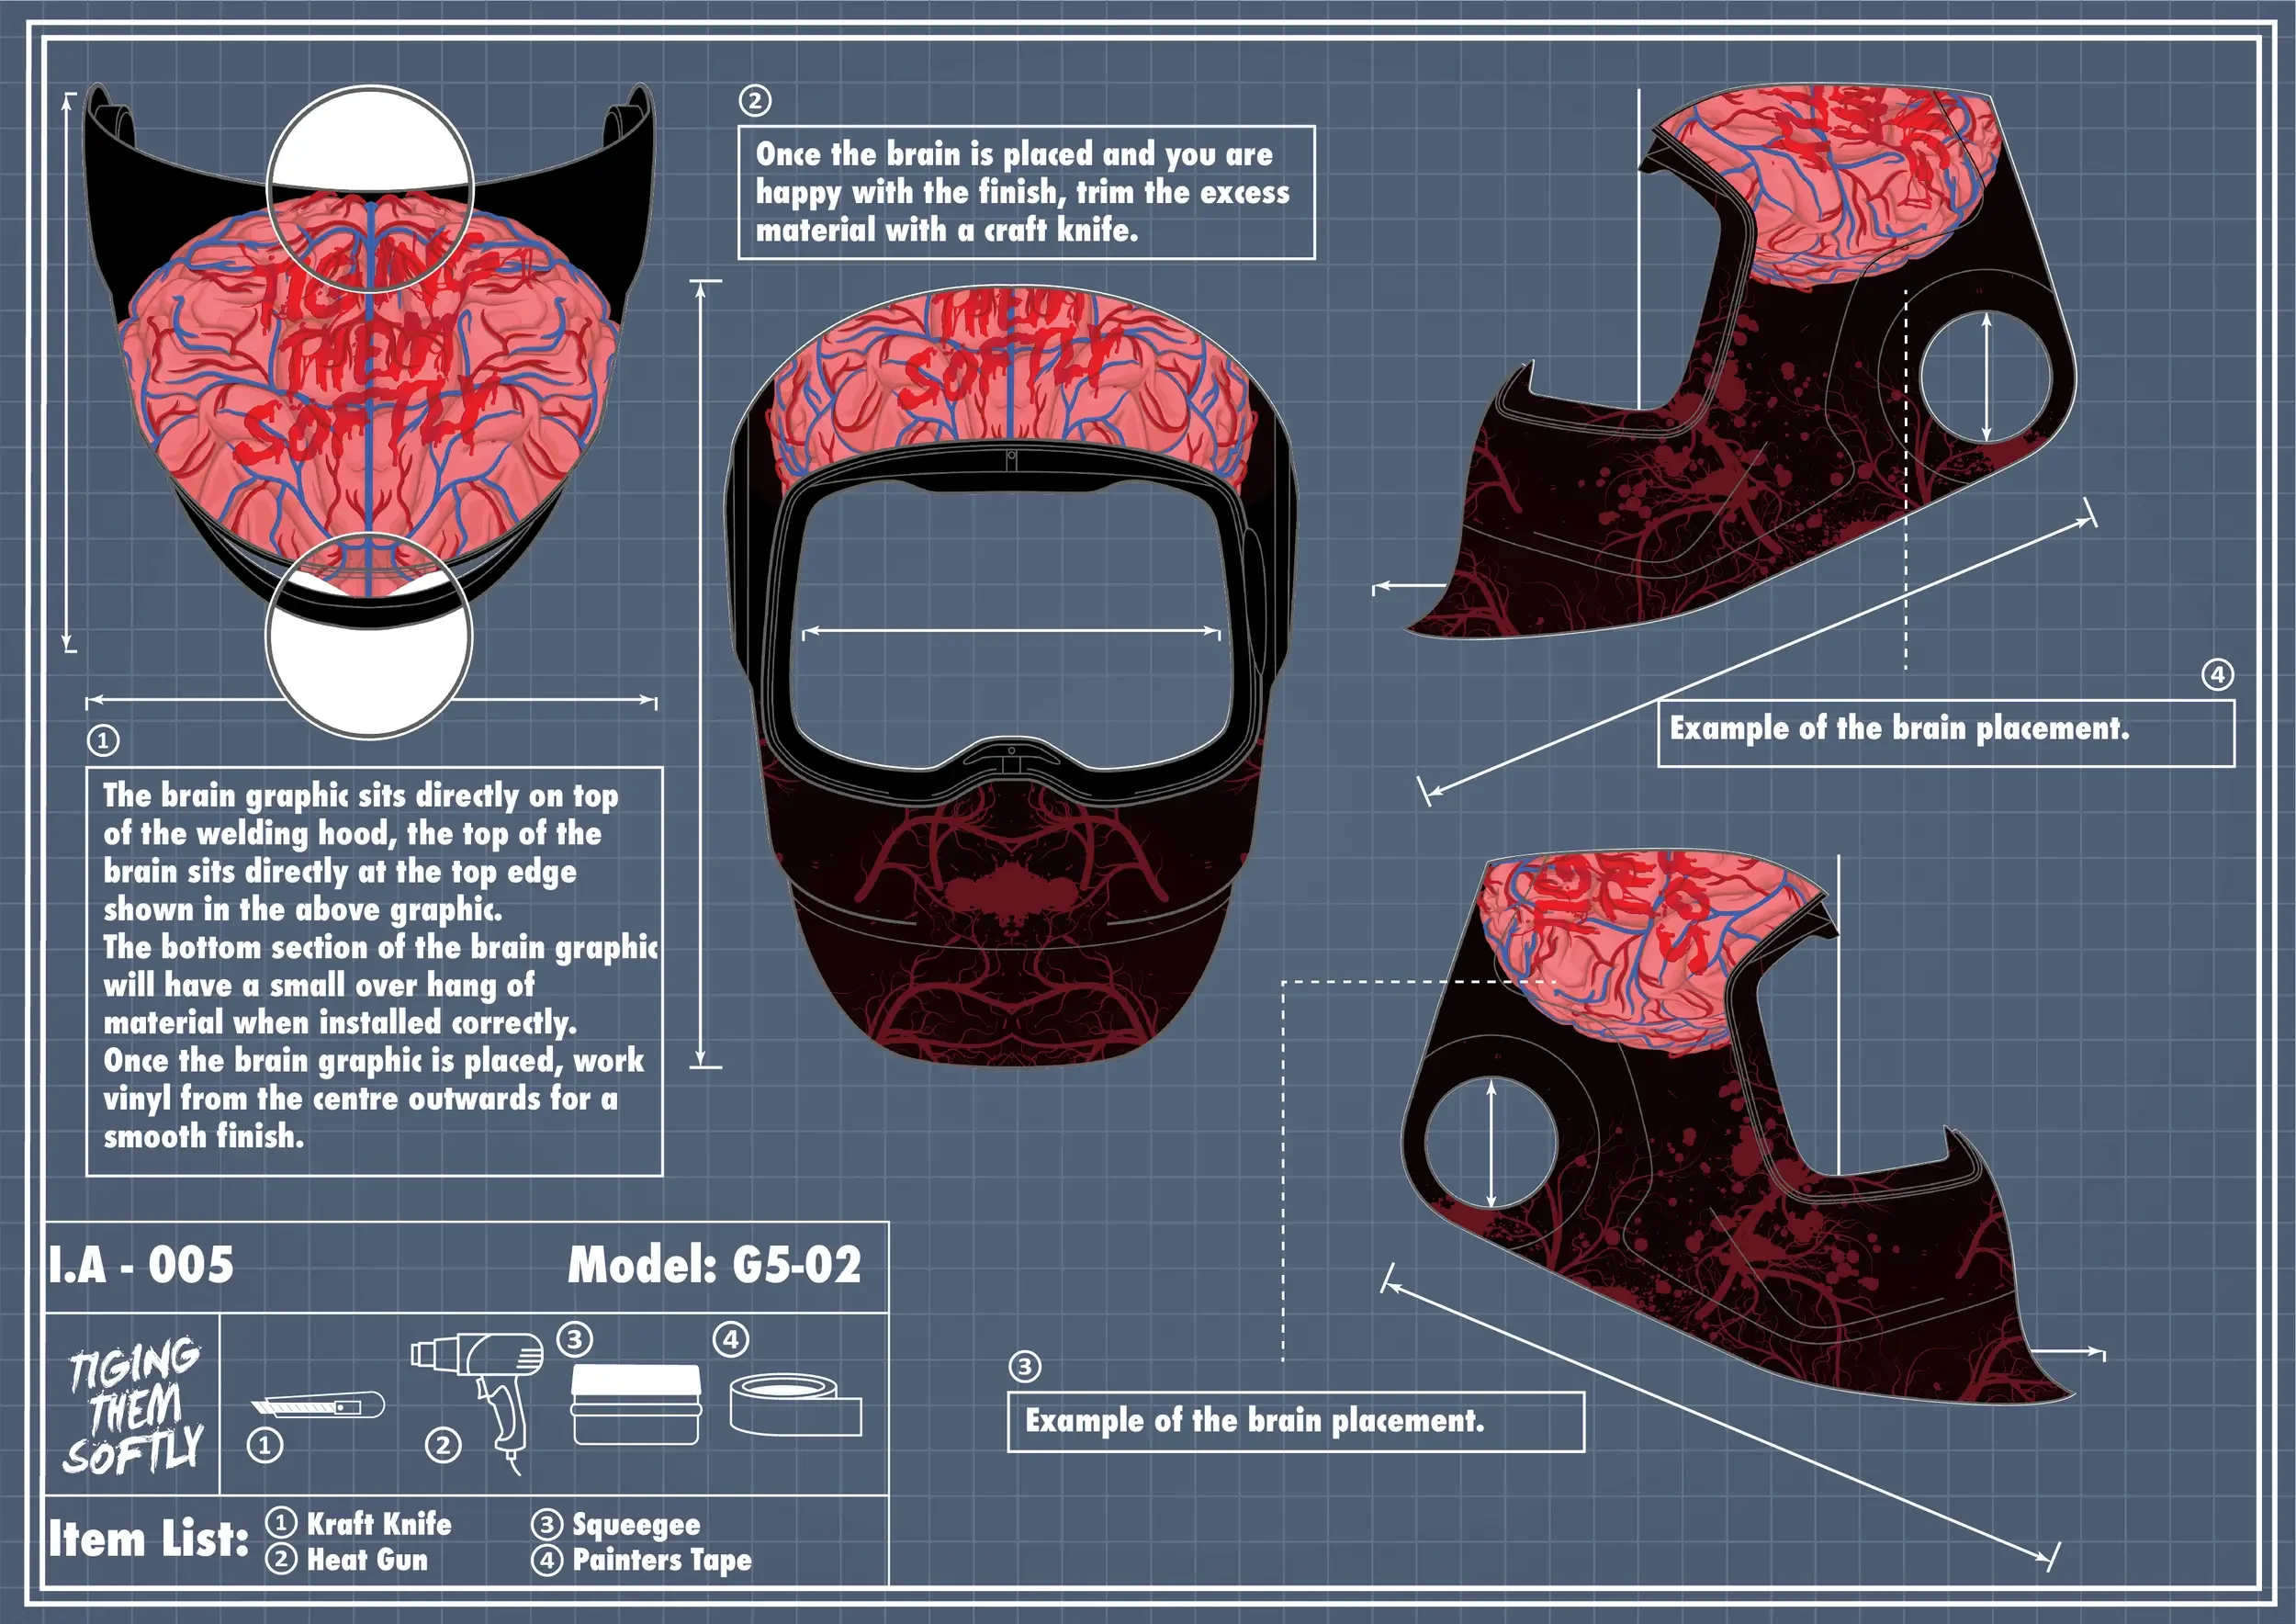


Tips for a Professional Finish
Work slowly and apply even pressure during installation.
Avoid overstretching vinyl on curved surfaces.
Use short bursts of heat to activate adhesive.
After application, inspect seams and edges.
After-Care & Maintenance
Clean only with mild soap and water.
Avoid solvents or harsh chemicals.
Store your helmet in a cool, dry place when not in use.
Your IA-FAB Flesh wrap is made to handle the heat — literally. To keep it looking fresh:
Flesh Welding Wraps FAQs
Common install questions from welders, answered by the IA-FAB team.
-
Absolutely. Each wrap includes a bubble-free adhesive backing and step-by-step instructions.
-
All current wraps are designed for the 3M G5-02 shell. Other models coming soon.
-
Contact IA-FAB support — replacement panels can be arranged for your model.